Monday, February 21, 2011

Finally...The Birthday Post - 3 years

I am a very lucky and blessed mom.  Sometimes I am luckier than I deserve.  It was the first week of January and I still had no secure place to celebrate my son's birthday.  Every time the thought of celebrating Carr's birthday at our apartment came up, I would start hyperventilating.  Wall to wall carpeting and any amount of 3 to 4 year old toddlers, do not mix.  But then that voice in your head says, you wouldn't dare not celebrate it!  I frantically started making phone calls, only to find out that many of the venues were booked 2 months in advance, even McDonald's doesn't do birthdays (yes, I was that desperate!) and that whatever place had availability was very expensive.  That said, I am glad I invested the money in this particular venue.  It is called Amazement Square.  Please visit their website, they are an incredible organization! Taken from their site, they define themselves as follows: "Amazement Square is Central Virginia's first multidisciplinary, hands-on children's museum!"


That said, I truly couldn't have pulled this all of without my husband.  He stood there while I "decorated" the cake (2am the night before).  He took care of Carr while I prepared everything and ran around at the museum.  Most importantly, he kept me calm and sane.  That, my friends is priceless.


All his little buddies were there.  Funny story:  all my son's friends, his little social circle, are children of friends of ours way back to college times.  How cool is that!  We have gone through break-ups, make-ups, weddings, pregnancies and now we face toddler mayhem together.  It was so nice looking at these photos and just reminescing how far we've come.


We have signed up to be members of the museum.  it is such a great place, I hope to take more photos and do them justice.  My son loved the farm exihibit most of all.


There is a common saying "It takes a village to bring up a child" and I believe this to be true.  I want to thank my family and my friends for helping, supporting and witnessing these important moments in my child's life.


Monday, February 14, 2011

Birthday preparations - Part two: The Cake


Simple White cake Recipe
1 cup of white sugar
1/2 butter 
2 eggs
2 teaspoons vanilla extract
1 and 1/2 all purpose flour
1 3/4 teaspoons baking poder
1/2 cup milk

Directions

  1. Preheat oven to 350 degrees F (175 degrees C). Grease and flour a pan or line a muffin pan.
  2. In a bowl, cream together the sugar and butter. Beat in the eggs, one at a time, then stir in the vanilla. Combine flour and baking powder, add to the creamed mixture and mix well. Finally stir in the milk until batter is smooth. Pour or spoon batter into the prepared pan.
  3. Bake for 30 to 40 minutes in the preheated oven. For cupcakes, bake 20 to 25 minutes. Cake is done when it springs back to the touch.
Chocolate cake

1 box of chocolate cake mix
1 box of chocolate pudding
1 large bag of chocolate chunks
3 tablespoons of milk and 3 tablespoons of butter

Directions
1.  Mix cake according to package directions and stir in chocolate chunks. Pour into pans and bake according to package directions.(cook for 35 minutes on 350°F)
2. Let cool completely.

    Decorating a cake is hard stuff.  The essential part is learning the difference between icing and frosting.  Huge!  Which I admit I didn't and that would explain why everything looks so running.  Wow, something so basic and that had a huge impact on the cake.  Another thing that I did check and totally steered me wrong was the amount of coloring that went in the frosting, two tubes and I only got this peony substitute for a grayish color.   Black is not that changing of white icing, you need lots to actually make it change.  Obviously, it is all dependant on the amount of icing and the size of the tubes.  Thankfully this is not a cooking blog and I have nowwhere said that I was an expert.  The amount of icing a big bowls worth and the tubes are the smallest size that you can buy.


    I am not an expert or even an aficionado to even expect this to look like a building with a Spider man on top but somehow the mommy guardian angel came, gave me a hand a made this.  It's not great but you should have seen my son's face when he opened the refrigerator and saw the finished cake.  He actually loved it!  And that my friends was enough for me.


    Maybe this is the last try at making a birthday cake but a part of me loves to do something from scratch in honor of my little man.  I might try something else next time, who knows?  I would love to hear some suggestions as to what would be good ideas for next year.

    Sunday, February 13, 2011

    Preparations for the birthday party - part one party favors

    It's been awhile since I have written a post.  We have all been sick in one way or another since Carr birthday. I've been saving all the little energy I had for my boys and work.  It's really hard to keep a house running when everyone in the household is sick.  Needless to mention, that crafts and hobbies take the back seat for a wile until the dusts settles.  Which is not the case now but heck tomorrows Valentine's Day!
     
    You would think that having Carr's birthday so close to Christmas should require special planning weeks ahead, right?  Christmas and New Years leave me exhausted after all the preparations, cookie baking and crafting. I wish I could say that but for the past 3 years, I have been caught off guard and unprepared. for  Carr's Birthday.   Thankfully, I  have managed to pull it together at the last minute with help from friends, family and event planning blogs.  Here is the post I published a year ago, please look at the DIY party favors for Carr's second birthday.

    This year I wanted to be more hands on, I had already decided that I didn't want to give away party favors that inevitably loaded up kids full of sugar and ended up in the trash.  I also wanted to theme his birthday cake.  Yes, I know, I am not a baker and certainly not a cake decorator!  You'll get to judge the cake yourself soon enough.  First thing is first, I want to thank Tasha @  Creation Corner for the best idea ever. Tasha's super cape idea and design are brilliant. Check out her blog, I am planning to make more of her crafts.


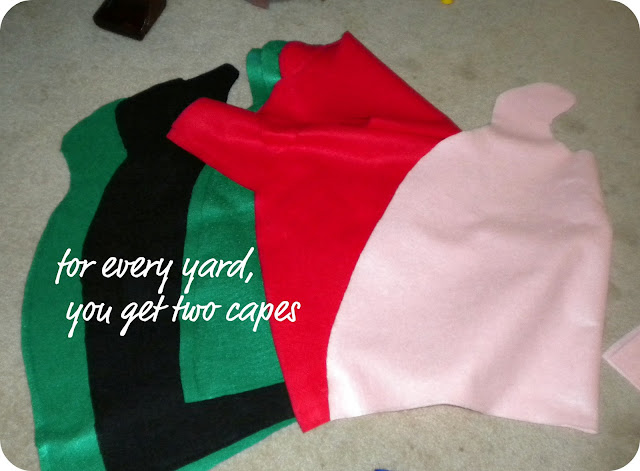
    Well, let's get started.   I suggest you go to Creation Corner and go over Tasha's instructions.  Her directions are easy to follow.  I was unsure of the measurements, and I ultimately wanted a bigger cape so I bought a yard in each color of felt.


    The only change that I made was adding a superhero symbol.  I chose oval because it was easier to draw,  folding the felt in half and sketching a crescent.  Because I was pressed for time I chose to use ironed on letters with  their first initial and spray adhesive.
    *Note: do not use anywhere near a child the fumes will get you loopy.


    Looking back, I realize now that I really would love to do this project again, this time enjoying it and taking my time.  This was a very easy project that actually took me two nights to get done.  Considering I would work on them from 11 pm.  Oh, I didn't sew the Velcro, I bought the self-adhesive.


    Another little piece of advice, not every child has your child's interest.  You must decide early on who you want to impress.  But sincerely, who can go wrong with superhero capes!

    A cape gives you super human strength and muscles.